

 CursesSharp is a C# wrapper for curses library.
- The latest version of this ‘fork’‘ can be found at Github.
- The original version can be found at the SourceForge.net project page.
I updated this to work for ‘modern’ autotools so allow autoreconf and configure to actual run without throwing errors and then I updated the Makefile.am’s files to allow compiling under OS-X and with Mono 4.0.x. Linux and Windows should still work, but I have not at this time tested those other flavors.
Let me know via Github issues if you have any problems. ;-)
Installing CursesSharp on OS-X
These are the instructions for building CursesSharp on OS-X. The build  CursesSharp is a C# wrapper for curses library.
process has been tested on 10.10.3 using Apple LLVM version 6.1.0 and a Mono 4.0.1 64-bit build.
CursesSharp is a C# wrapper for curses library.
process has been tested on 10.10.3 using Apple LLVM version 6.1.0 and a Mono 4.0.1 64-bit build.
0. Prerequisites
- Subversion - if you intend to build CursesSharp from SVN repository. If you use the source code package, you don’t need Subversion.
- autoconf/automake/libtool - only if you are building from SVN. You don’t need these tools if you use the source code package.
- Standard development tools - a C compiler (e.g. GCC) and GNU make (gmake).
- Ncurses library and headers (development files) - typically this package is called ncurses-dev.
- Mono - the .NET runtime and development framework
- pkg-config - typically required by Mono, but make sure it’s installed
1. Getting CursesSharp
You will have to obtain CursesSharp sources. You clone it from the following repository:
https://github.com/sushihangover/CursesSharp.git
Original SVN Repo:
https://curses-sharp.svn.sourceforge.net/svnroot/curses-sharp/trunk
The following section describes the former case. If you downloaded the source code package, extract it and you may skip to step 4.
2. Git clone
Execute the following command:
git clone https://github.com/sushihangover/CursesSharp.git cursessharp
You may substitute the final cursessharp for any other directory of your liking.
3. Bootstrapping
In order to proceed with the build, you will have to create the configure script. Cd into the directory containing CursesSharp sources and execute the following command:
brew link gettext –force
autoreconf -if
4. Configure
In the top source directory execute the command:
LIBS="-lncurses -liconv -lpanel" ./configure
By default CursesSharp is installed in /usr/local. To change the target directory, which you really should do, you can use the “–prefix=” option:
# Following all on one line:
LIBS="-lncurses -liconv -lpanel" ./configure --prefix=$HOME/cursessharp
You can also use other options. For a complete list execute:
./configure --help
5. Make
After you executed configure, run (in the same directory):
#I am using a locally built/installed 64-bit version of mono, so I add it to the path
export PATH=/Users/administrator/mono/mono-llvm-64/bin:$PATH
make
# remove brew's version of gettext
brew unlink gettext
To compile the source code.
6. Installation
Execute the command:
make install
This will install CursesSharp. Make sure you have appropriate privileges.
7. Testing
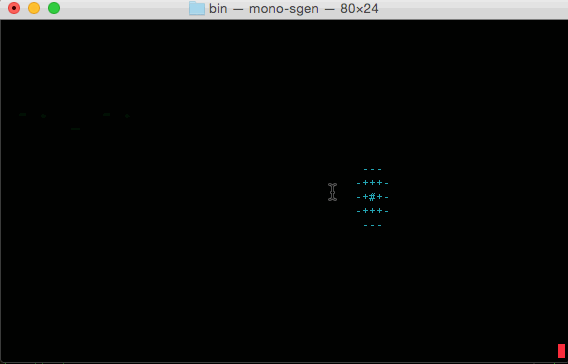
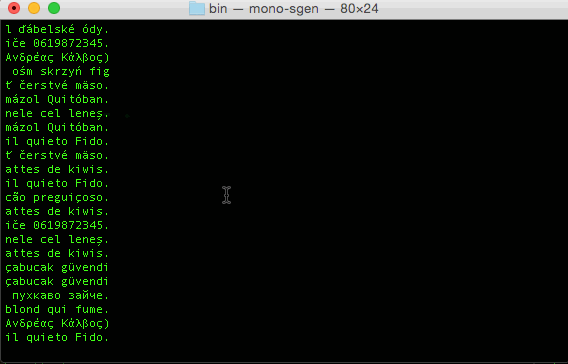
By default CursesSharp will install a few demonstration programs. At this time, these are: FireworkDemo and RainDemo. You can try running the demos to check if CursesSharp works.
Running the demos:
Add your cursessharp’s bin install location to your path, i.e.
export PATH=$HOME/cursessharp/bin:$PATH
And you can run them from anywhere:
RainDemo
FireworksDemo
UnicodeDemo
Have fun ;-)